ผมมีโอกาสทดลองติดตั้ง Windows 7 Professional (RTM) จึงนำภาพหน้าจอการขั้นตอนการติดตั้งมาฝากครับ ซึ่งขั้นตอนการติดตั้งจะคล้ายๆ กันกับการติดตั้ง Windows 7 Build 7600 หรือ Windows 7 RC (Build 7100) แต่จะเพิ่มขั้นตอนการเลือกรุ่น (Edition) ที่ต้องการติดตั้งขึ้นมาหนึ่งขั้นตอน สำหรับหรับขั้นตอนการติดตั้ง Windows 7 เวอร์ชันอื่นๆ ดูได้ตามจากเว็บไซต์ Windows 7 Ultimate Installation และ Windows 7 Home Premium Installation และ Windows 7 Home Basic
การทดลองในครั้งนี้ จะติดตั้งเวอร์ชัน Windows 7 Professional 32-bit บนเครื่องเวอร์ชวลคอมพิวเตอร์ที่รันบน SUN VirtualBox 3.0.2 โดยผมคอนฟิกเวอร์ชวลแมชชีนให้ใช้ RAM 1GB เวอร์ชวลฮาร์ดดิสก์ขนาด 32 GB
System Requirements สำหรับ Windows 7 Professional (RTM)
Windows 7 Professional (RTM) มีความต้องการระบบขั้นต่ำดังนี้
- CPU: ความเร็ว 1 GHz 32-bit (x86) หรือ 64-bit (x64) ซีพียู
- Memory: หน่วยความจำอย่างน้อย 1 GB สำหรับเวอร์ชัน 32-bit และ 2 GB สำหรับเวอร์ชัน 64-bit
- Disk space: พื้นที่ฮาร์ดดิสก์อย่างต่ำ 16 GB สำหรับเวอร์ชัน 32-bit และ 20 GB สำหรับเวอร์ชัน 64-bit
- Graphics: รองรับ DirectX 9 และ Windows Display Driver Model 1.0 หรือสูงกว่า สำหรับการใช้งาน Aero theme
- Other: DVD-R/W Drive, Internet access (สำหรับดาวน์โหลด Windows 7 และ Update)
ขั้นตอนการติดตั้ง Windows 7 Professional (RTM)
การติดตั้ง Windows 7 Professional (RTM) มีขั้นตอนดังนี้
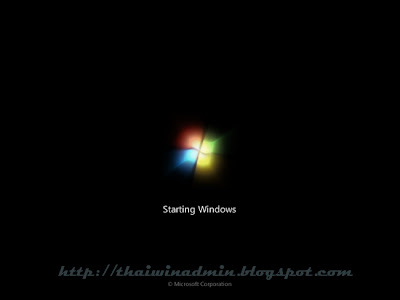
1. เมื่อทำการบูตเครื่องคอมพิวเตอร์ด้วยแผ่นดีวีดี Windows Setup จะได้หน้าจอ Windows is loading files และ Starting Windows ดังรูปที่ 1 ให้รอจนระบบทำงานแล้วเสร็จ

รูปที่ 1 Starting Windows
2. ในหน้าต่าง Install Windows ให้เลือกภาษาที่ต้องการ และตั้งค่าอื่นๆ ตามความต้องการ เสร็จแล้วคลิก Next เพื่อไปยังขั้นตอนต่อไป
ในที่นี้เลือก:
- Language to install: English
- Time and currency format: English (United States)
- Keyboard or input method: US

รูปที่ 2 Install Windows
3. ในหน้าต่างถัดไปให้คลิก Install Now เพื่อเริ่มทำการติดตั้ง Windows 7

รูปที่ 3 Install Now
4. ในหน้า Select the operating system you want to install ให้เลือก Windows 7 Professional เสร็จแล้วคลิก Next

รูปที่ 4 Windows 7 Professional
5. ในหน้าต่าง Please read the license terms ให้อ่าน License Terms เสร็จแล้ว ให้คลิกเช็คบ็อกซ์ I accept the license terms จากนั้นคลิก Next เพื่อไปยังหน้าถัดไป

รูปที่ 5 EULA
6. ในหน้าต่าง Which type of installation do you want? ให้เลือกเป็น Custom (Advanced)

รูปที่ 6 Custom (Advanced) installation
7. ในหน้าต่าง Where do you want to install Windows? ให้เลือก Hard Disk/Partition ที่ต้องการติดตั้ง เสร็จแล้วคลิก Next

รูปที่ 7 Select Hard Disk/Partition
หมายเหตุ: ในกรณีที่ใน Hard Disk/Partition ที่เลือกมีการติดตั้งวินโดวส์เวอร์ชันอื่นอยู่ ระบบจะแสดงข้อความแจ้งเตือน ให้คลิก OK เพื่อยืนยันการติดตั้ง Windows 7
8. ระบบจะเริ่มทำการติดตั้ง Windows โดยจะดำเนินการต่างๆ ดังนี้ คือ Copying Windows files, Expanding Windows files, Installing features และ Installing updates หลังจากทำการติดตั้งขั้นตอน Installing updates แล้วเสร็จ จะทำการรีสตาร์ทระบบ 1 ครั้ง หลังจากรีสตาร์ทเสร็จจะทำขั้นตอน Completing Installation ต่อ หลังจากทำขั้นตอน Completing Installation แล้วเสร็จ จะทำการรีสตาร์ทระบบอีก 1 ครั้ง

รูปที่ 8 Installing Windows
9. ในหน้าต่าง Set Up Windows ระบบจะให้เลือก User name และตั้งชื่อเครื่องคอมพิวเตอร์ ให้พิมพ์ User name ที่ต้องการในกล่องใต้ Type a user name: จากนั้นใส่ชื่อเครื่องคอมพิวเตอร์ที่ต้องการในกล่องใต้ Type a computer name: เสร็จแล้วคลิก Next

รูปที่ 9 Set Up Windows
10. ในหน้าต่าง Set a password for your account ระบบจะให้กำหนดรหัสผ่านสำหรับ User name ที่สร้างในขั้นตอนที่ 8 ใส่รหัสผ่านที่ต้องการ 2 ครั้ง ในกล่องใต้ Type a password (recommended): และ Retype your password: จากนั้นพิมพ์ข้อมูลช่วยจำรหัสผ่านในช่อง Type a password hint: เสร็จแล้วคลิก Next

รูปที่ 10 Set a password for your account
หมายเหตุ: ในขั้นตอนที่ 10 นี้ ไม่จำเป็นต้องกำหนดรหัสผ่านก็ได้ แต่เพื่อเพิ่มความปลอดภัยให้กับระบบ ผมขอแนะนำให้กำหนดรหัสผ่าน และในกรณีที่กำหนดรหัสผ่านจะต้องกำหนดข้อมูลช่วยจำรหัสผ่านด้วย ระบบจึงจะยอมให้ดำเนินการในขั้นตอนถัดไป
11. ในหน้าต่าง Type your Windows product key ให้ใส่หมายเลขโปรดักส์คีย์ (ขั้นตอนนี้เป็นอ็อปชันไม่จำเป็นต้องใส่ก็ได้) เสร็จแล้วคลิก Next
หมายเหตุ: หมายเลขโปรดักส์คีย์นั้น ไมโครซอฟท์จะให้มาพร้อมกับการดาวน์โหลดสำหรับผู้ที่เป็นสมาชิก Technet และ MSDN สำหรับลูกค้าทั่วไปนั้นจะมาพร้อมกับแพ็กเกจที่ซื้อ

รูปที่ 11 Type your Windows product key
Tip: ผมแนะนำให้เคลียร์เช็คบ็อกซ์ Automatically activate Windows when I'm online แล้วค่อยทำการแอคติเวตแบบแมนนวลภายหลัง
12. ในหน้าต่าง Help protect your computer and improve Windows automatically ให้เลือก Use recommended settings หรือ Install important updates only หรือ Ask me later ในที่นี้เลือกหัวข้อหลัง

รูปที่ 12 Help protect your computer and improve Windows automatically
13. ในหน้าต่าง Review your time and date settings ให้ทำการตั้ง Time Zone ให้ตรงพื้นที่ใช้งาน และตั้ง Date และ Time ให้ตรงกับวัน-เวลาจริง เสร็จแล้วคลิก Next

รูปที่ 13 Review your time and date setting
หมายเหตุ: Time Zone ของประเทศไทยเป็น UTC+07.00 หรือ GMT+07:00 ในวินโดวส์เวอร์ชันก่อนหน้า
14. ในหน้าต่าง Select your computer's current location ให้เลือกเป็น Home network หรือ Work network หรือ Public network

รูปที่ 14 Select your computer's current location
หมายเหตุ: ขั้นตอนนี้จะมีเฉพาะในกรณีมีการเชื่อมต่อกับระบบเน็ตเวิร์ก
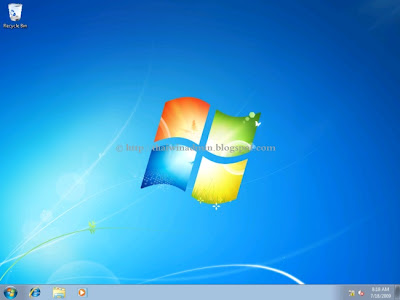
15. วินโดวส์จะทำการจัดเตรียมระบบตามการตั้งค่าต่างๆ ที่กำหนดในขั้นตอนด้านบน เมื่อเสร็จแล้วก็จะได้หน้า Desktop ดังรูปด้านล่าง

รูปที่ 15 Windows 7 Professional (RTM) Desktop
หมายเลขเวอร์ชันของ Windows 7 Professional (RTM)
หลังจากทำการติดตั้ง Windows 7 Professional (RTM) เสร็จเรียบร้อยแล้ว สามารถดูหมายเลขเวอร์ชันได้โดยการรันคำสั่ง winver (คลิก Start พิมพ์ winver ในช่อง Search programs and files เสร็จแล้วกด Enter) เมื่อดูเวอร์ชันของ Windows 7 Professional (RTM) หมายเลขเวอร์ชันคือ 6.1 (Build 7600) และจุดที่แตกต่างอีกหนึ่งอย่างคือ Professional (RTM) จะไม่มีวันหมดอายุ ในขณะที่ RC จะหมดอายุในวันที่ 2 มีนาคม 2553
หมายเหตุ: ถ้าหากรันคำสั่ง ver ที่คอมมานด์พร็อมท์หมายเลขเวอร์ชันคือ 6.1.7600

รูปที่ 16 Windows 7 Professional (RTM) Version Number

รูปที่ 17 System Information
Windows 7 Professional (RTM) Log on Screen
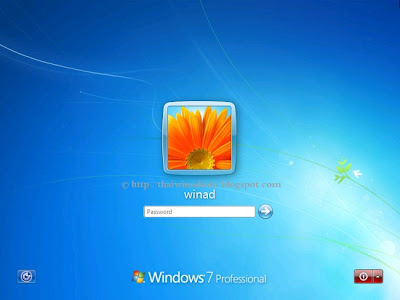
เมื่อทำการสตาร์ทเครื่องคอมพิวเตอร์ที่ใช้ Windows 7 Professional (RTM) จะได้หน้า Log on Screen ดังรูปด้านล่าง

รูปที่ 18 Windows 7 Log on Screen
ลิงก์ที่เกี่ยวข้อง
บทความโดย: Thai Windows Administrator Blog
© 2009 TWAB. All Rights Reserved.


0 Comment:
Post a Comment