Windows 7 Enterprise Edition นั้นเป็นรุ่นสำหรับลูกค้าแบบ Volume License ซึ่งไมโครซอฟท์ได้เปิดให้ดาวน์โหลดผ่านทาง VLSC เมื่อวันที่ 8 ส.ค. ที่ผ่านมา (อ่านรายละเอียดได้ที่เว็บไซต์ Windows 7 RTM Available to Volume License Customers (ภาษาไทย)) สำหรับบทความนี้ ผมนำภาพหน้าจอการติดตั้ง Windows 7 Enterprise ซึ่งผมมีโอกาสทดลองมาฝากกันครับ
การติดตั้ง Windows 7 Enterprise ครั้งนี้ เป็นการติดตั้งเวอร์ชัน 32-bit บนเวอร์ชวลคอมพิวเตอร์ (Virtual Machine) ที่รันบน Windows Server 2008 Hyper-V โดยผมคอนฟิกเวอร์ชวลแมชชีนให้ใช้หน่วยความจำ 2GB และเวอร์ชวลฮาร์ดดิสก์ขนาด 32GB
หมายเหตุ: เครื่องเซิร์ฟเวอร์ใช้ระบบปฏิบัติการ Windows Server 2008 SE with SP2 (64-bit) ฮาร์ดแวร์เป็น IBM x3650 ใช้ซีพียู Intel E5540 2.83GHz, RAM 8GB, Hard Disk 3x146 GB
ขั้นตอนการติดตั้ง Windows 7 Enterprise
การติดตั้ง Windows 7 Enterprise มีขั้นตอนดังนี้
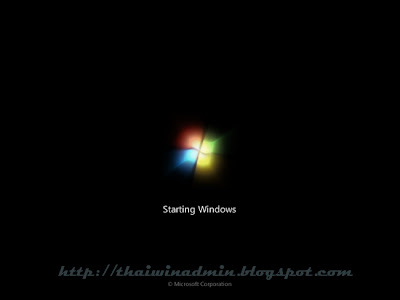
1. ทำการบูตเครื่องคอมพิวเตอร์ด้วยแผ่นดีวีดี Windows Setup จะได้หน้าจอ Windows is loading files และ Starting Windows ดังรูปที่ 1 ให้รอจนระบบทำงานแล้วเสร็จ

รูปที่ 1 Starting Windows
2. ในหน้าต่าง Install Windows ให้เลือกภาษาที่ต้องการ และตั้งค่าอื่นๆ ตามความต้องการ เสร็จแล้วคลิก Next เพื่อไปยังขั้นตอนต่อไป
ในที่นี้เลือก:
Language to install: English
Time and currency format: English (United States)
Keyboard or input method: US

รูปที่ 2 Install Windows 7
3. ในหน้าต่างถัดไปให้คลิก Install Now เพื่อทำเริ่มการติดตั้ง Windows 7

รูปที่ 3 Install Now
4. ในหน้าต่าง Please read the license terms ให้อ่าน License Terms เสร็จแล้ว ให้คลิกเช็คบ็อกซ์ I accept the license terms จากนั้นคลิก Next เพื่อไปยังหน้าถัดไป

รูปที่ 4 EULA
5. ในหน้าต่าง Which type of installation do you want? ให้เลือกเป็น Custom (Advanced)

รูปที่ 5 Custom (Advanced) installation
6. ในหน้าต่าง Where do you want to install Windows? ให้เลือก Hard Disk/Partition ที่ต้องการติดตั้ง เสร็จแล้วคลิก Next

รูปที่ 6
หมายเหตุ: ในกรณีที่ใน Hard Disk/Partition ที่เลือกมีการติดตั้งวินโดวส์เวอร์ชันอื่นอยู่ ระบบจะแสดงข้อความแจ้งเตือน ให้คลิก OK เพื่อยืนยันการติดตั้ง Windows 7
7. ระบบจะเริ่มทำการติดตั้ง Windows โดยจะดำเนินการต่างๆ ดังนี้ คือ Copying Windows files, Expanding Windows files, Installing features และ Installing updates
หลังจากทำการติดตั้งขั้นตอน Installing updates แล้วเสร็จ จะทำการรีสตาร์ทระบบ 1 ครั้ง หลังจากรีสตาร์ทเสร็จจะทำขั้นตอน Completing Installation ต่อ หลังจากทำขั้นตอน Completing Installation แล้วเสร็จ จะทำการรีสตาร์ทระบบอีก 1 ครั้ง

รูปที่ 7 Installing Windows
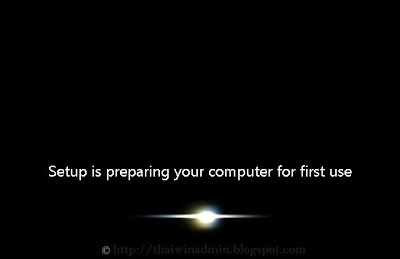
8. หลังจากรีสตาร์ทก็จะทำการเตรียมระบบดังรูปที่ 8 เสร็จแล้วจะแสดงหน้าต่าง Set Up Windows ดังรูปที่ 9 เพื่อให้เลือก User name และตั้งชื่อเครื่องคอมพิวเตอร์
โดยในหน้าต่าง Set Up Windows ให้พิมพ์ User name ที่ต้องการในกล่องใต้ Type a user name: จากนั้นใส่ชื่อเครื่องคอมพิวเตอร์ที่ต้องการในกล่องใต้ Type a computer name: เสร็จแล้วคลิก Next

รูปที่ 8 Preparing Computer

รูปที่ 9 Set Up Windows
9. ในหน้าต่าง Set a password for your account ระบบจะให้กำหนดรหัสผ่านสำหรับ User name ที่สร้างในขั้นตอนที่ 8 ใส่รหัสผ่านที่ต้องการ 2 ครั้ง ในกล่องใต้ Type a password (recommended): และ Retype your password:
จากนั้นพิมพ์ข้อมูลช่วยจำรหัสผ่านในช่อง Type a password hint: เสร็จแล้วคลิก Next

รูปที่ 10 Set a password for your account
หมายเหตุ:
ในขั้นตอนที่ 9 นี้ ไม่จำเป็นต้องกำหนดรหัสผ่านก็ได้แต่เพื่อเพิ่มความปลอดภัยให้กับระบบ ผมขอแนะนำให้กำหนดรหัสผ่าน และกรณีที่กำหนดรหัสผ่านจะต้องกำหนดข้อมูลช่วยจำรหัสผ่านด้วย ระบบจึงจะยอมให้ดำเนินการในขั้นตอนถัดไป
10. ในหน้าต่าง Help protect your computer and improve Windows automatically ให้เลือก Use recommended settings หรือ Install important updates only หรือ Ask me later ในที่นี้เลือกหัวข้อหลัง

รูปที่ 11 Help protect your computer and improve Windows automatically
12. ในหน้าต่าง Review your time and date settings ให้ทำการตั้ง Time Zone ให้ตรงพื้นที่ใช้งาน และตั้ง Date และ Time ให้ตรงกับวัน-เวลาจริง เสร็จแล้วคลิก Next

รูปที่ 12 Review your time and date setting
โดยไทม์โซนของประเทศไทยคือ UTC+07.00
13. ในหน้าต่าง Select your computer's current location ให้เลือกเป็น Home network หรือ Work network หรือ Public network

รูปที่ 13 Select your computer's current location
หมายเหตุ: ขั้นตอนนี้จะมีเฉพาะในกรณีมีการเชื่อมต่อกับระบบเน็ตเวิร์ก
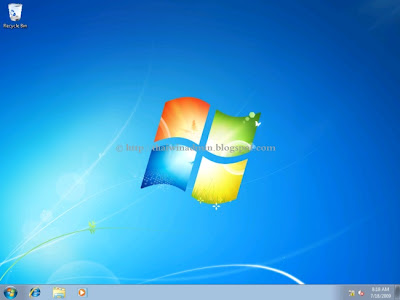
14. วินโดวส์จะทำการจัดเตรียมระบบตามการตั้งค่าต่างๆ ที่กำหนดในขั้นตอนด้านบน เมื่อเสร็จแล้วก็จะได้หน้า Desktop ดังรูปด้านล่าง

รูปที่ 14 Windows 7 Enterprise Desktop
• หมายเลขเวอร์ชันของ Windows 7 Enterprise
หลังจากทำการติดตั้ง Windows 7 Enterprise เสร็จเรียบร้อยแล้ว สามารถดูหมายเลขเวอร์ชันได้โดยการรันคำสั่ง winver (คลิก Start พิมพ์ winver ในช่อง Search programs and files เสร็จแล้วกด Enter) โดยหมายเลขเวอร์ชันของ Windows 7 Enterprise คือ 6.1 (Build 7600)
หมายเหตุ: ถ้าหากรันคำสั่ง ver ที่คอมมานด์พร็อมท์หมายเลขเวอร์ชันคือ 6.1.7600

รูปที่ 15 Windows 7 Enterprise Version Number
• Windows 7 Enterprise Log on Screen
เมื่อทำการสตาร์ทเครื่องคอมพิวเตอร์ที่ใช้ Windows 7 Enterprise จะได้หน้า Log on Screen ดังรูปด้านล่าง

รูปที่ 16 Log on Screen
หมายเหตุ: การติดตั้ง Windows 7 Enterprise จะไม่มีขั้นตอนให้ป้อนหมายเลขโปรดักส์คีย์ (Product key) เหมือนกับการติดตั้ง Windows 7 รุ่นอื่นๆ
บทความโดย: Thai Windows Administrator Blog
© 2009 TWA Blog. All Rights Reserved.


0 Comment:
Post a Comment