หมายเหตุ:
ล่าสุดนั้นไมโครซอฟท์ได้ปรับขั้นตอนการติดตั้ง Internet Explorer 7 ใหม่เล็กน้อย โดยตัดขั้นตอนการทำ Validate ออกไป
การติดตั้ง Internet Explorer 7.0
การติดตั้ง Internet Explorer 7.0 นั้น ไม่มีอะไรซับซ้อน ก่อนอื่นให้ตรวจสอบความพร้อมของระบบก่อน ซึ่ง Internet Explorer 7 เวอร์ชันสำหรับ Windows XP นั้น จะติดตั้งได้เฉพาะระบบที่ติดตั้ง Service Pack 2 แล้วเท่านั้น โดยมีความต้องการระบบขั้นต่ำ ดังรายละเอียดด้านล่าง
Hardware
Internet Explorer 7.0 นั้น มีความต้องการฮาร์ดแวร์ ดังนี้
Computer/Processor
- Computer with a 233MHz processor or higher (Pentium processor recommended)
Memory (For Internet Explorer 7 only)
- Windows XP Service Pack 2 (SP2) - 64 MB
- Windows XP Professional x64 Edition - 128 MB
- Windows Server 2003 Service Pack 1 (SP1) - 64 MB
- Windows Server 2003 Service Pack 1 ia64 - 128 MB
Drive
- CDROM drive (if installation is done from a CD-ROM)
Display
- Super VGA (800 x 600) or higher-resolution monitor with 256 colors
Peripherals
- Modem or Internet connection; Microsoft Mouse, Microsoft IntelliMouse, or compatible pointing device
Operating System
- Windows XP Service Pack 2 (SP2)
- Windows XP Professional x64 Edition
- Windows Server 2003 Service Pack 1 (SP1)
ดาวน์โหลด
สามารถดาวน์โหลด Internet Explorer ได้จากศูนย์บริการดาวน์โหลดของไมโครซอฟท์ ที่ http://www.microsoft.com/windows/downloads/ie/getitnow.mspx
ขั้นตอนการติดตั้ง Internet Explorer 7.0
เมื่อทำการดาวน์โหลดเสร็จเรียบร้อยแล้ว ขั้นต่อไปก็เริ่มทำการติดตั้ง (ในการติดตั้ง Internet Explorer 7 นั้น จะให้ทำการ Validate ระบบ Windows XP ที่ใช้ด้วยว่าถูกลิขสิทธิ์หรือไม่) ตามขั้นตอนดังนี้
1. ในโฟลเดอร์ซึ่งเก็บไฟล์ที่ทำการดาวน์โหลด ให้ดับเบิลคลิกที่ไฟล์ IE7-WindowsXP-x86-enu.exe จะได้หน้าไดอะล็อกบ็อกซ์ Welcome to Windows Internet Explorer 7 ดังรูปที่ 1
2. ในหน้าไดอะล็อกบ็อกซ์ Welcome to Windows Internet Explorer 7 ดังรูปที่ 1 ให้คลิก Next จะได้หน้าไดอะล็อกบ็อกซ์ Please read the license terms ดังรูปที่ 2
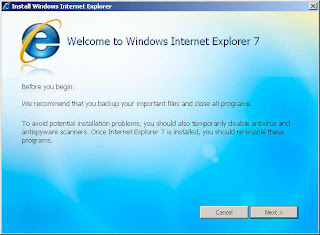
รูปที่ 1. Welcome to Windows Internet Explorer 7
3. ในหน้าไดอะล็อกบ็อกซ์ Please read the license terms ดังรูปที่ 2 ให้คลิก I accept
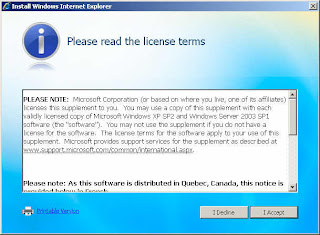
รูปที่ 2. Please read the license terms
4. ในหน้าไดอะล็อกบ็อกซ์บ็อกซ์ Validate your copy of Windows ดังรูปที่ 3 ให้คลิก Validate
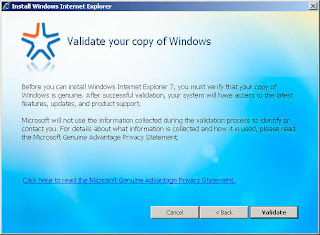
รูปที่ 3. Validate your copy of Windows
5. เมื่อทำการ Validate ผ่านเรียบร้อยแล้วระบบจะให้ทำการอัพเดทวินโดวส์ ให้คลิก Next
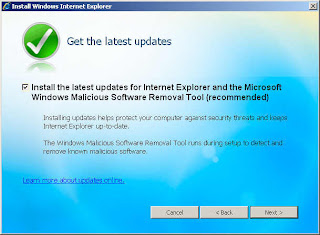
รูปที่ 4. Update for Internet Explorer and Windows
6. เมื่อทำการอัพเดทแล้วเสร็จ ระบบก็จะทำการติดตั้ง Internet Explorer 7 ดังรูปที่ 5
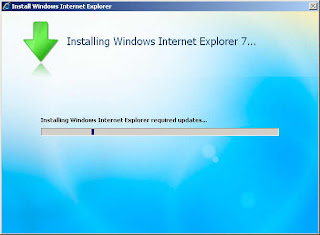
รูปที่ 5. Installing Windows Internet Explorer 7
7. เมื่อทำการติดตั้งแล้วเสร็จ ระบบก็จะแสดงไดอะล็อกบ็อกซ์ให้ทำการรีสตาร์ทเครื่อง ให้คลิก Restart now (Recommended)
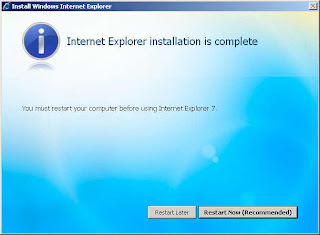
รูปที่ 6 Internet Explorer Installation is complete
8. เมื่อคอมพิวเตอร์รีสตาร์ทแล้วเสร็จก็สามารถใช้งาน Internet Explorer 7 ได้ตามปกติ อาจทดลองใช้งานโดยท่องไปยังเว็บไซต์ต่างบนอินเทอร์เน็ต
Internet Explorer 7 IE7 Installation
© 2006 Thai Windows Administrator, All Rights Reserved.


0 Comment:
Post a Comment